 In this tutorial, you will learn how to create a 3D composition using Xara 3D and Photoshop. We will use Photoshop to create an exciting golden background, then integrate the 3D type from Xara 3D into the composition. you will also learn some simple technique to texture the type.
Last time we learned How to Create A Realistic 3D Typography using Photoshop, today I will introduce you to Xara 3D, a relatively inexpensive 3D Program that has some very powerful features and is so simple to use, literally anyone can produce high quality 3D graphics in minutes. Xara 3D can create stunning, professional-quality 3D web graphics. Ideal for both still and animated 3D headings and titles, logos and buttons, perfect for web pages, mailshots and online presentations. If you want to use 3D in your projects Xara 3D is a very good start. Ok, lets get straight into the tutorial!
[sociallocker]
Final Image
Skill Level
Advanced
Resources
Music 3D.png by loswl
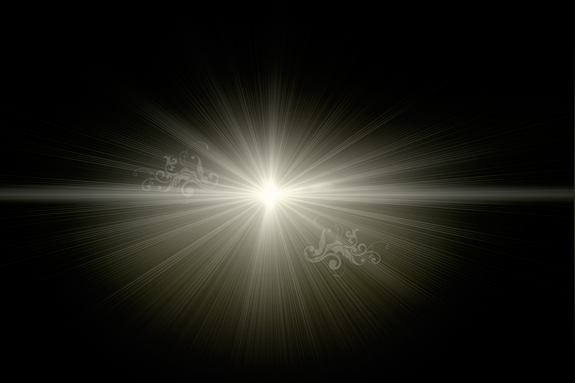
Lens Flare by loswl
Wall Texture by ~T~ [tirilhauan]
Vector Musical Instruments by trait designs
Floral Brushes by solenero73
Step 1
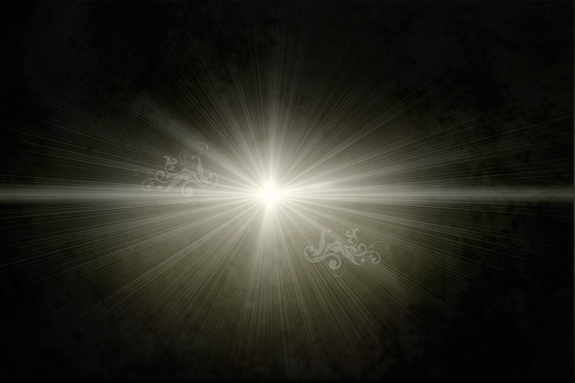
Open a new document with a White Background 1600×1200 at 72dpi. Add a large lens flare above background. My Lens Flare was created using Knoll Light Factory Plugin, If you have the plugin, create a black layer above the white background, launch Knoll Light Factory and choose the preset Lens Flare called Bright Bluelight. you can download the Lens Flare I created, if you do not have the plugin.

Change the Blending Mode of the Lens Flare to Luminosity.

Step 2
Soften the Lens Flare by adding a Linear Black Transparent Gradient above it: Set your Foreground color to black, click on the Gradient Tool to activate the Gradient Options. set the Gradient to the settings in the image below. then click OK.
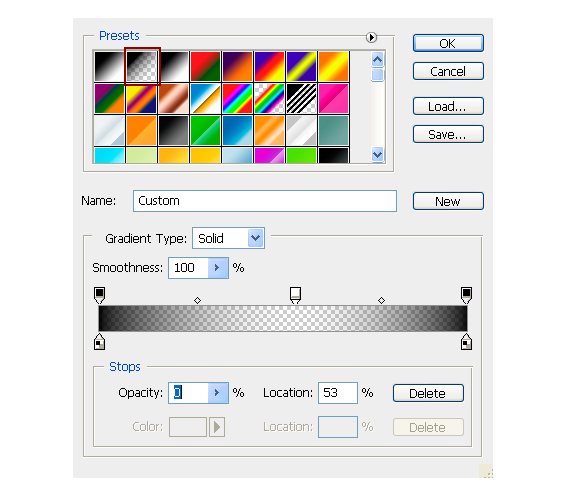
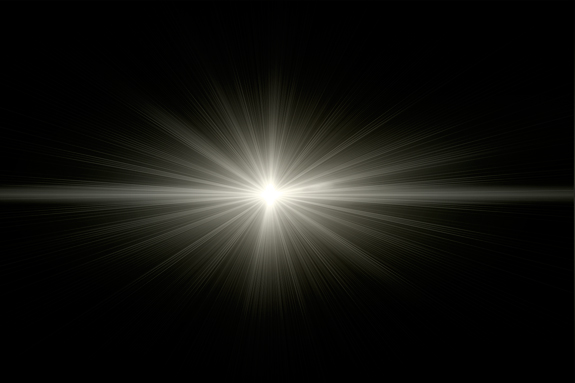
With the gradient tool still selected, make a new layer above the lensflare. Hold Shift and drag your mouse from the top of your document to the bottom. Change the Blending Mode to Soft Light. This creates a softer edge for the lens flare.
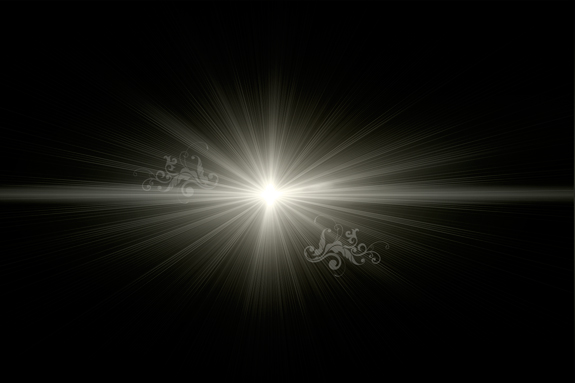
Add a couple floral treatment to the background. I used Floral Brushes by solenero73. Use white as your Brush color and give the layer a 70% Opacity. You can do adjustments to the placment of the floral later.
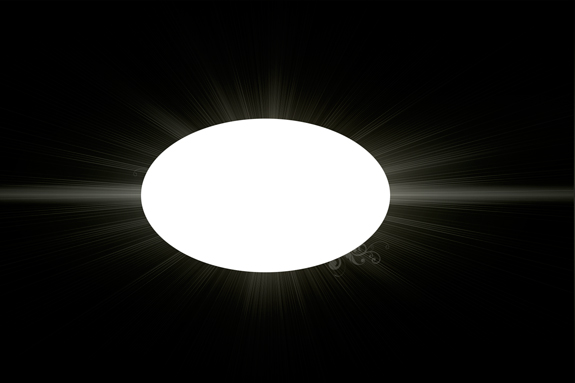
Add a little more glow to the background by drawing a large oval shape on a New Layer with the Elliptical Marquee Tool. Fill the selection with white, then give the layer a 170% Gaussian Blur. Filter > Blur > Gaussian Blur, then lower the Opacity about 25%. and change the Blending Mode to Soft Light.
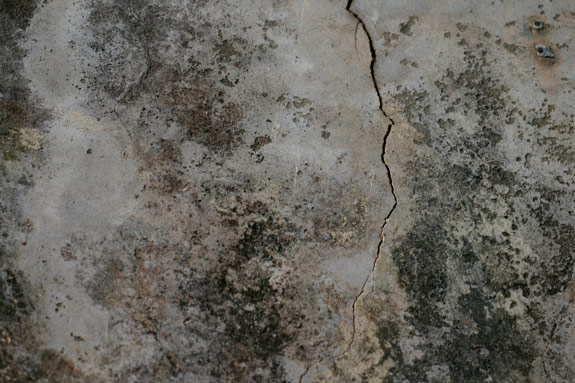
Open the Wall Texture by ~T~ [tirilhauan]
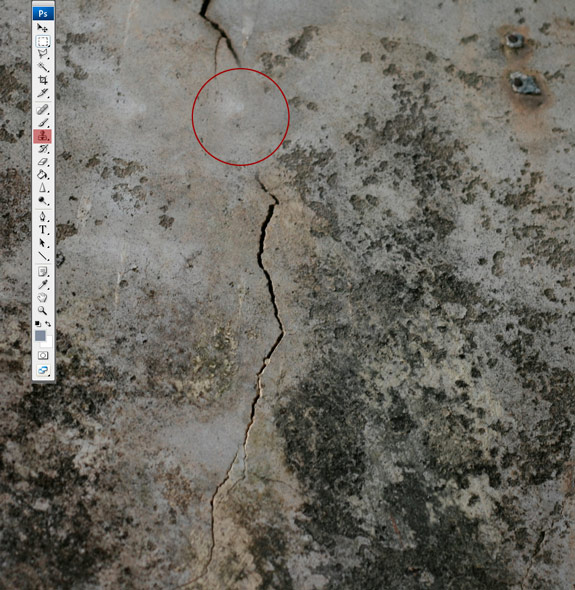
Clean up the texture, by removing the big crack with the Clone Tool. Use a soft brush, then Alt-Click an area without the gray patches to clone it, then start brushing the crack away.
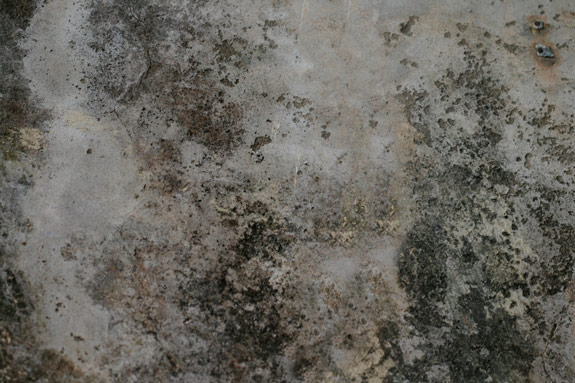
Add 24% noise to the Wall Texture. Filter > Noise > Add Noise, then drag the Wall Texture above the other existing layers. Lower the Opacity to 25%.
Step 3
Add some color to the scene by using Fill Adjustment layers (Color Balance, Gradients Fills and Hue/Saturation).
Color Balance 1: Click the “Half Moon” symbol at the bottom of the layer palette and select, Color Balance from the Menu and add the following settings.
Cyan: -41
Magenta: -21
Yellow: -16
Lower the Fill to 56% in the Blending Options.
Gradient Fill 1: Click the “Half Moon” symbol at the bottom of the layer palette and select, Gradient from the Menu.
Use these colors: #ed9017 #f8d04a #f6e6b5
Change the Blending Mode to Linear Burn, change the Opacity to 48% and the Fill to 74%
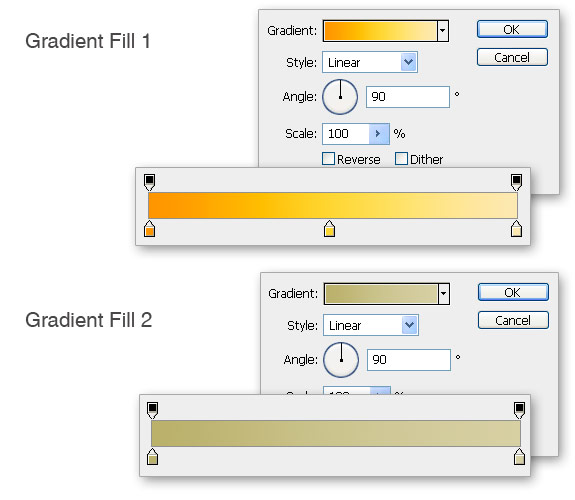
Gradient Fill 2: Create another Gradient Fill, with the options below.
Use these colors: #b7ad70 #d5cea6
Change the Blending Mode to Vivid Light, leave the Opacity at 100%
Color Balance 2: Click the “Half Moon” symbol at the bottom of the layer palette and select, Color Balance from the Menu.
Cyan: +9
Magenta: +14
Yellow: +4
Leave the Fill at 100 % in the Blending Options.
Create a group of the Color Balance and Gradient Fill Layers. Shift Click, the layers until all are selected, then while you are still holding Shift, click on the Create A New Group Icon (folder symbol beside the half moon symbol at the bottom of the layers palette). Name the Group “Light Color”. All the elements in your design should stay beneath this group.

Step 4
Save your Photoshop Document then Launch Xara 3D to start creating the 3D Type. if you do not have Xara 3D, Download the Music 3D.png.
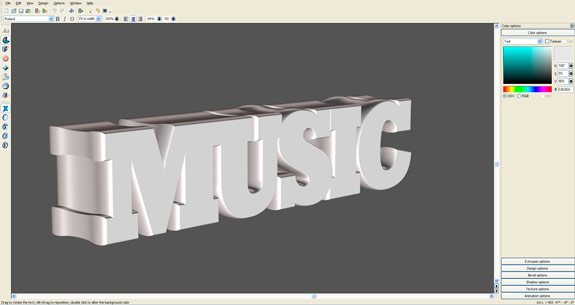
- Font: Roland, that was a default font on my PC, but any font will do.
- Bevel Type: Rolled, Depth 21
- Shadows: Off
- Extrusion: Depth 59 Outline, Width 20
Step 5

Light 1: (Left): # FFFFFF
Light 2: (Back): # 140D24
Light 3: (Front): # FFFFFF
Step 6
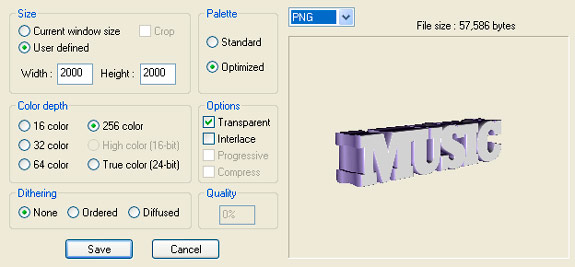
Set up your Xara document to export your 3D Type. Window > Quality Settings > Set the Export Quality to High, then press OK. Then click File > Export, Create a name for your file eg “Music” and save the file as a .PNG. An Export dialog box will appear, use the settings in the image below, then press Save.
Open the 3D Type in Photoshop, then before dragging it into the lens flare document, change the color mode from index to RGB. Image > Mode > RGB Color, Now drag the 3D Type into your original document, below your “Light Color” Group.

Make a selection of the 3D Type by Ctrl clicking the layer icon in the layer pallette. Create a New Layer above the 3D Type and Color the selection Black with the Paint Bucket.

Change the Blending Mode of the “Black Layer” to Multiply, Open and drag the Wall Texture by ~T~ [tirilhauan], Above the “Black Layer”, Resize the texture down to the size of the 3D Type.
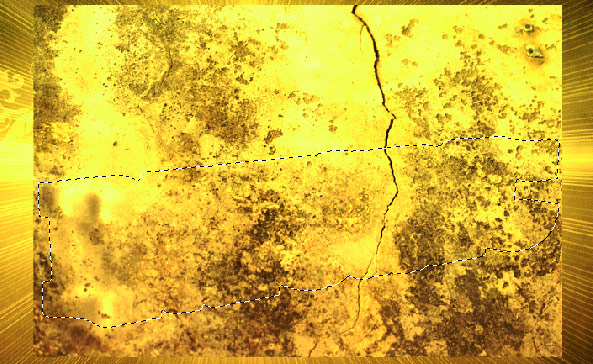
point your mouse right between the layers of the Wall Texture and the “Black Layer” and Alt-Click when you see the pathfinder symbol appear, see Image Below.

Step 7
Now we will Create the 3D Spheres using the Ellipse Tool (u), and Layer Styles
- Use the Ellipse Tool (u) with the
- Shape Layer option selected. (This option allows scaling of the circle without destroying the pixels)
- Hold Shift and drag to draw a perfect circle.
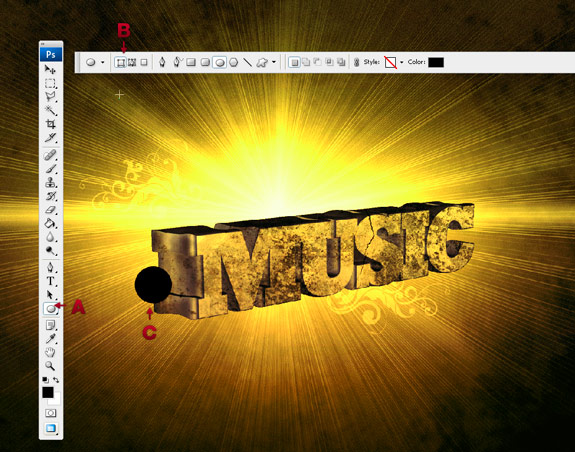
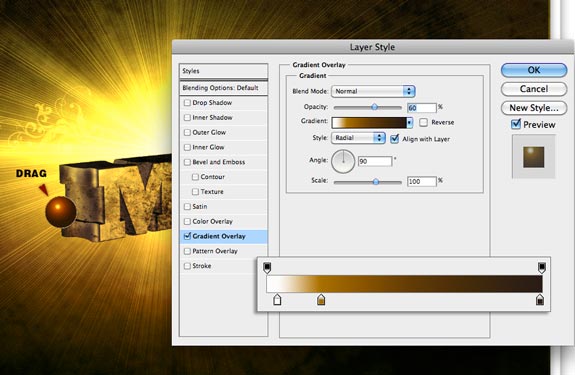
Apply a Gradient Overlay to the circle and drag the lightest area to the top of the circle, like the image below.
Hex Numbers: #fcfcfa, #976d14, #2a211c
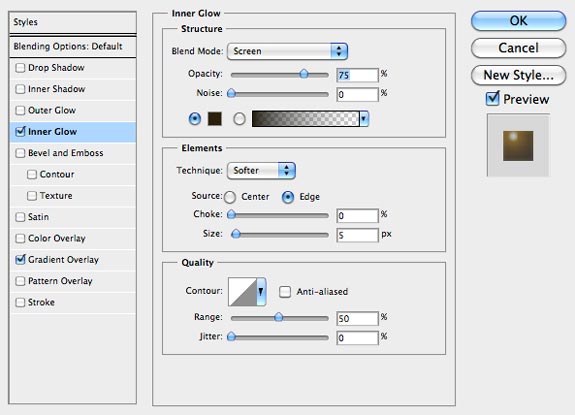
Apply a Inner Glow, Hex Color #2c2614
Add a soft Drop Shadow, Hex Color: #2a2d21
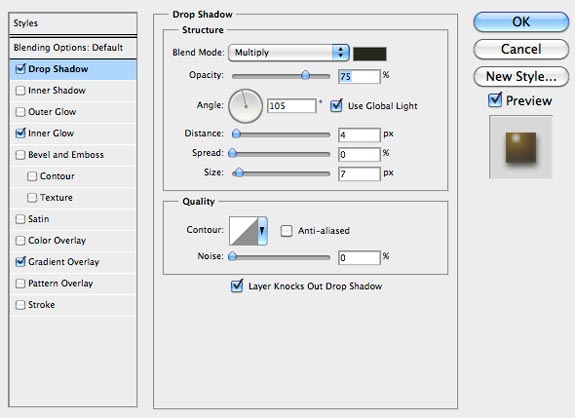
You should have something that looks, like the image below.

Duplicate, Re-size and Group the Spheres and start to place them behind the 3D Type. I grouped some of them and Changed the group to a Smart Object. I also placed some blurred spheres that are further to the back behind the “Wall Texture”that I did back in Step 2, this creates a sense of depth, because the color is lighter than the spheres in front.
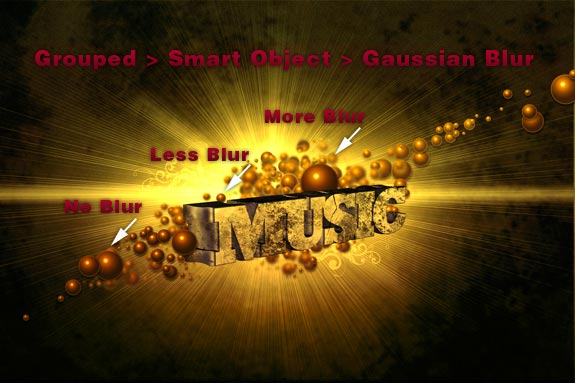
Place some smaller spheres in front of the 3D Type. Then place some of the Vector Musical Instruments by trait designs behind and between the spheres, useing the same “blur technique” to create depth.

Step 8
Create “Lighting Strand” Effect with the Pen Tool, Brush Strokes and Layer Styles. Start by creating a New Layer above the Spheres and 3D Type,
- Draw a long curved path with Pen Tool,
- While the Pen Tool is still selected, Right Click the path and select Stroke Path, from the Pop-Up Menu.
- Stroked Path with Brush with Simulate Pressure Selected
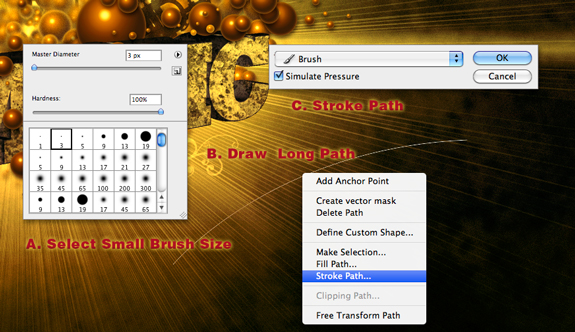
Drag the Path into the Trash, ( you can find the Path in the layer Palette Menu). Go back to the layers Menu and apply These Layer Styles to the Stroke.
Gradient Overlay: #fcfcfa #976d14

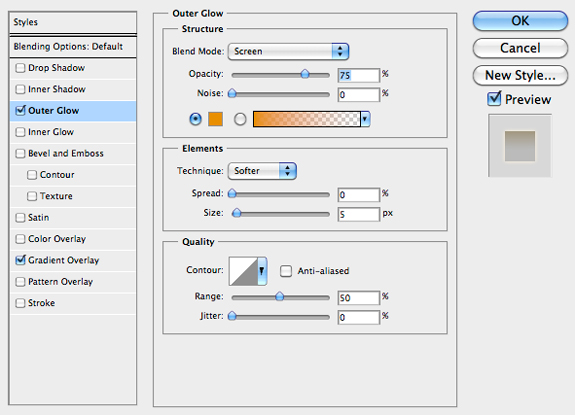
Outer Glow: #d38e21

Step 9
Duplicate and Group and Re-Sze the “Light Strand”, then make more duplicates place them around the 3D Type and Sphere.

Final Image
Conclusion:
PURCHASE THE .PSDWe successfully created a realistic 3D composition using Xara3D and Photoshop. Xara is an excellent 3D program and a very useful tool to have in your arsenal. Later, I will post a tutorial for using a more professional program like Cinema 4D to create 3D Type.
Judges 5:3
“Hear, O kings! Give ear, O princes!
I, even I, will sing to the LORD;
I will sing praise to the LORD God of Israel.
[/sociallocker]
Buy the Fully Layered Facebook Timeline Photoshop Template





14 thoughts on “3D Composition Using Xara 3D and Photoshop”
I am kinda confused with the step 2. Do I have to add Linear Black Transparent Gradient with a new layer above the len flare background? Or Do I have to click the blending option and, then click the gradient overlay again with fen flare? how can I change fen flare background to the Blending Mode to Soft Light like this.
thank you awesome tut 😀
Thank youuuuuuuuuuuu a lot ! that was very interesting !! i loved the techniques !!
🙂
I’ll share mine on your group on flickr
Glad you found the tut useful Houda, love what you created for your website header 🙂
YIKES! That was simple as it was awesome, your really did a great job loswl! a highly recommendable tutorial
Thanks for the compliments on the tut Printguy 🙂
Wow this is awesome! So many tutorials so little time. Great job.
Hey Yasmin, hope you get a chance to try it out.
Great tutorial. I love the final outcome.
Keep up the great work Loswl!!
Thank you jeyaOne 🙂
Nice tut, very well explained, I think I’ll try that out! 🙂
Hi Jessica, happy you like the tut, if you try it out feel free to share it here or post it in our Flickr group. http://www.flickr.com/groups/inspiks/
Nice tutorial bro, really well carried through- love it,. Keep up the good stuffs.
Thanks Kashane, glad you enjoyed it 🙂