Tutorials

5 Secrets to Pro-Level AI Filmmaking: Directing vs. Prompting

5 Secrets to Pro-Level AI Filmmaking: Directing vs. Prompting

January 22, 2026 |

The “uncanny valley” is the graveyard of most AI filmmaking projects. We’ve all seen the symptoms: the “floaty” movements, temporal artifacts, and sudden character morphing that occurs when the model loses track of the latent space. To the casual user, it looks like a glitch; to a Senior Creative Technologist, it’s a sign that the creator is still using “training wheels” workflows. The magic isn’t in a single, complex prompt—it’s in the technical “hacker” pipelines that treat AI as a visual effects department rather than a magic wand. If you want to move beyond jittery generations and into intentional, cinematic AI filmmaking, you have to stop asking the AI to “make a movie” and start directing it through specific, post-production-inspired workflows. Takeaway 1: Stop Prompting, Start Storyboarding for Consistent AI Filmmaking Maintaining character consistency across shots is the hardest problem in AI filmmaking. If you generate shots individually, the “seed”…    read more 

5 Secrets to Cinematic AI Storytelling: One Image, Infinite Stories

5 Secrets to Cinematic AI Storytelling: One Image, Infinite Stories

January 12, 2026 |

Introduction: The Cinematic Universe in a Single Frame Creating compelling cinematic AI storytelling often feels like a frustrating battle against inconsistency. After 200+ generations, you get a perfect character, only to lose them in the next shot. You have a scene in your mind, but the AI renders something flat and uninspired. This struggle to achieve cinematic quality and maintain character consistency is a common roadblock for creators. What if the solution wasn’t to generate more, but to start with less? A transformative approach suggests that a single, meticulously crafted “foundation image” can serve as the master key, unlocking a universe of camera angles, movements, and emotional depth. This method shifts the focus from wrestling with the AI to directing it with precision. This post will share five of the most impactful takeaways from this process, revealing how to move beyond simple generation to become a true AI-driven director. 1….    read more 

Design Brilliance Unleashed: Learn the Secrets of Inserting Images into Shapes in Microsoft Word

Design Brilliance Unleashed: Learn the Secrets of Inserting Images into Shapes in Microsoft Word

🖥️ Elevate Your Microsoft Word Design Game! 🎨 Godserv Designs brings you an engaging tutorial on the art of inserting images into shapes, unlocking a world of creative possibilities. Perfect for beginners and design enthusiasts alike, this step-by-step video guide showcases the process using the Blue Sky Funeral Program Template but extends its application to a variety of design projects. Learn to seamlessly inserting images and customizing images within specific shapes, giving your documents a polished and professional look. Quick, easy, and packed with valuable tips, this tutorial is a must-watch for those seeking to enhance their Microsoft Word design skills. For a hands-on experience, check out the tutorial here and elevate your design game today! 🚀

How to Replace Images in Microsoft Word Template

How to Replace Images in Microsoft Word Template

If you’ve recently purchased a Microsoft Word or Publisher template from platforms like Godserv.com, Etsy, Creative Market, or Design Bundles, you might find yourself needing to replace images within the template to personalize it. In this tutorial, we will focus on the “Change Image from File” method in Microsoft Word, which allows you to seamlessly replace photos and image backgrounds in your template. Whether you’re creating invitations, flyers, or any other document, mastering this technique will help you customize your templates effectively. So let’s dive in and learn how to replace images in Microsoft Word templates! Video Tutorial Open the Microsoft Word Template: Begin by opening the Word template you purchased. It could be an invitation, brochure, or any other document you wish to customize. Familiarize yourself with the existing images that need replacement. Locate the Image Placeholder: Identify the image placeholder within the template. It is usually denoted by…    read more 

Edit Microsoft Word Funeral Program Template

Edit Microsoft Word Funeral Program Template

When it comes to creating a funeral program, Microsoft Word offers a versatile and user-friendly platform to bring your vision to life. In this blog, we will provide a comprehensive review of how to edit Microsoft Word Funeral Program Templates. By learning these essential tips and tricks, you can accomplish 90 percent of the work required to edit these templates efficiently. We have also included a video tutorial that covers the main focus areas, including inserting photos, editing text, and modifying colors. So let’s dive in and become proficient in editing Funeral Program Templates using Microsoft Word! Video Tutorial Replacing Photos in Word One crucial aspect of personalizing funeral program templates is replacing the default photos with meaningful images. The video tutorial demonstrates the step-by-step process to accomplish this. By following along, you will learn how to select and insert a photo, adjust its size, and position it correctly within…    read more 

smudge script

Smudge Script Photoshop Lettering Technique

September 12, 2018 |

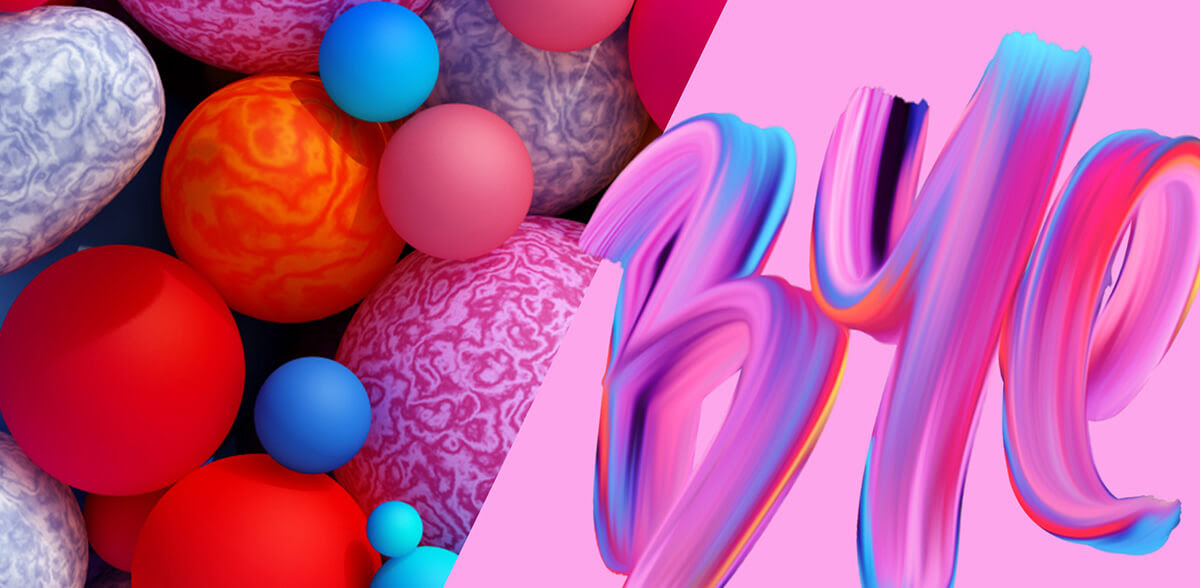
Multidisciplinary designer Luke Choice tells stories through dynamic color and composition for a broad range of clients. Learn as you follow along with this talented artist, how to create Smudge Script in Photoshop. [creativ_button url=”https://create.adobe.com/2018/6/27/creative_house_calls.html” icon=”” label=”View Detailed Tutorial on Adobe Create Magazine” colour=”theme” colour_custom=”” size=”large” edge=”rounded” target=”_self”]

Smart Object

How to Insert a Photo into a Photoshop Smart Object

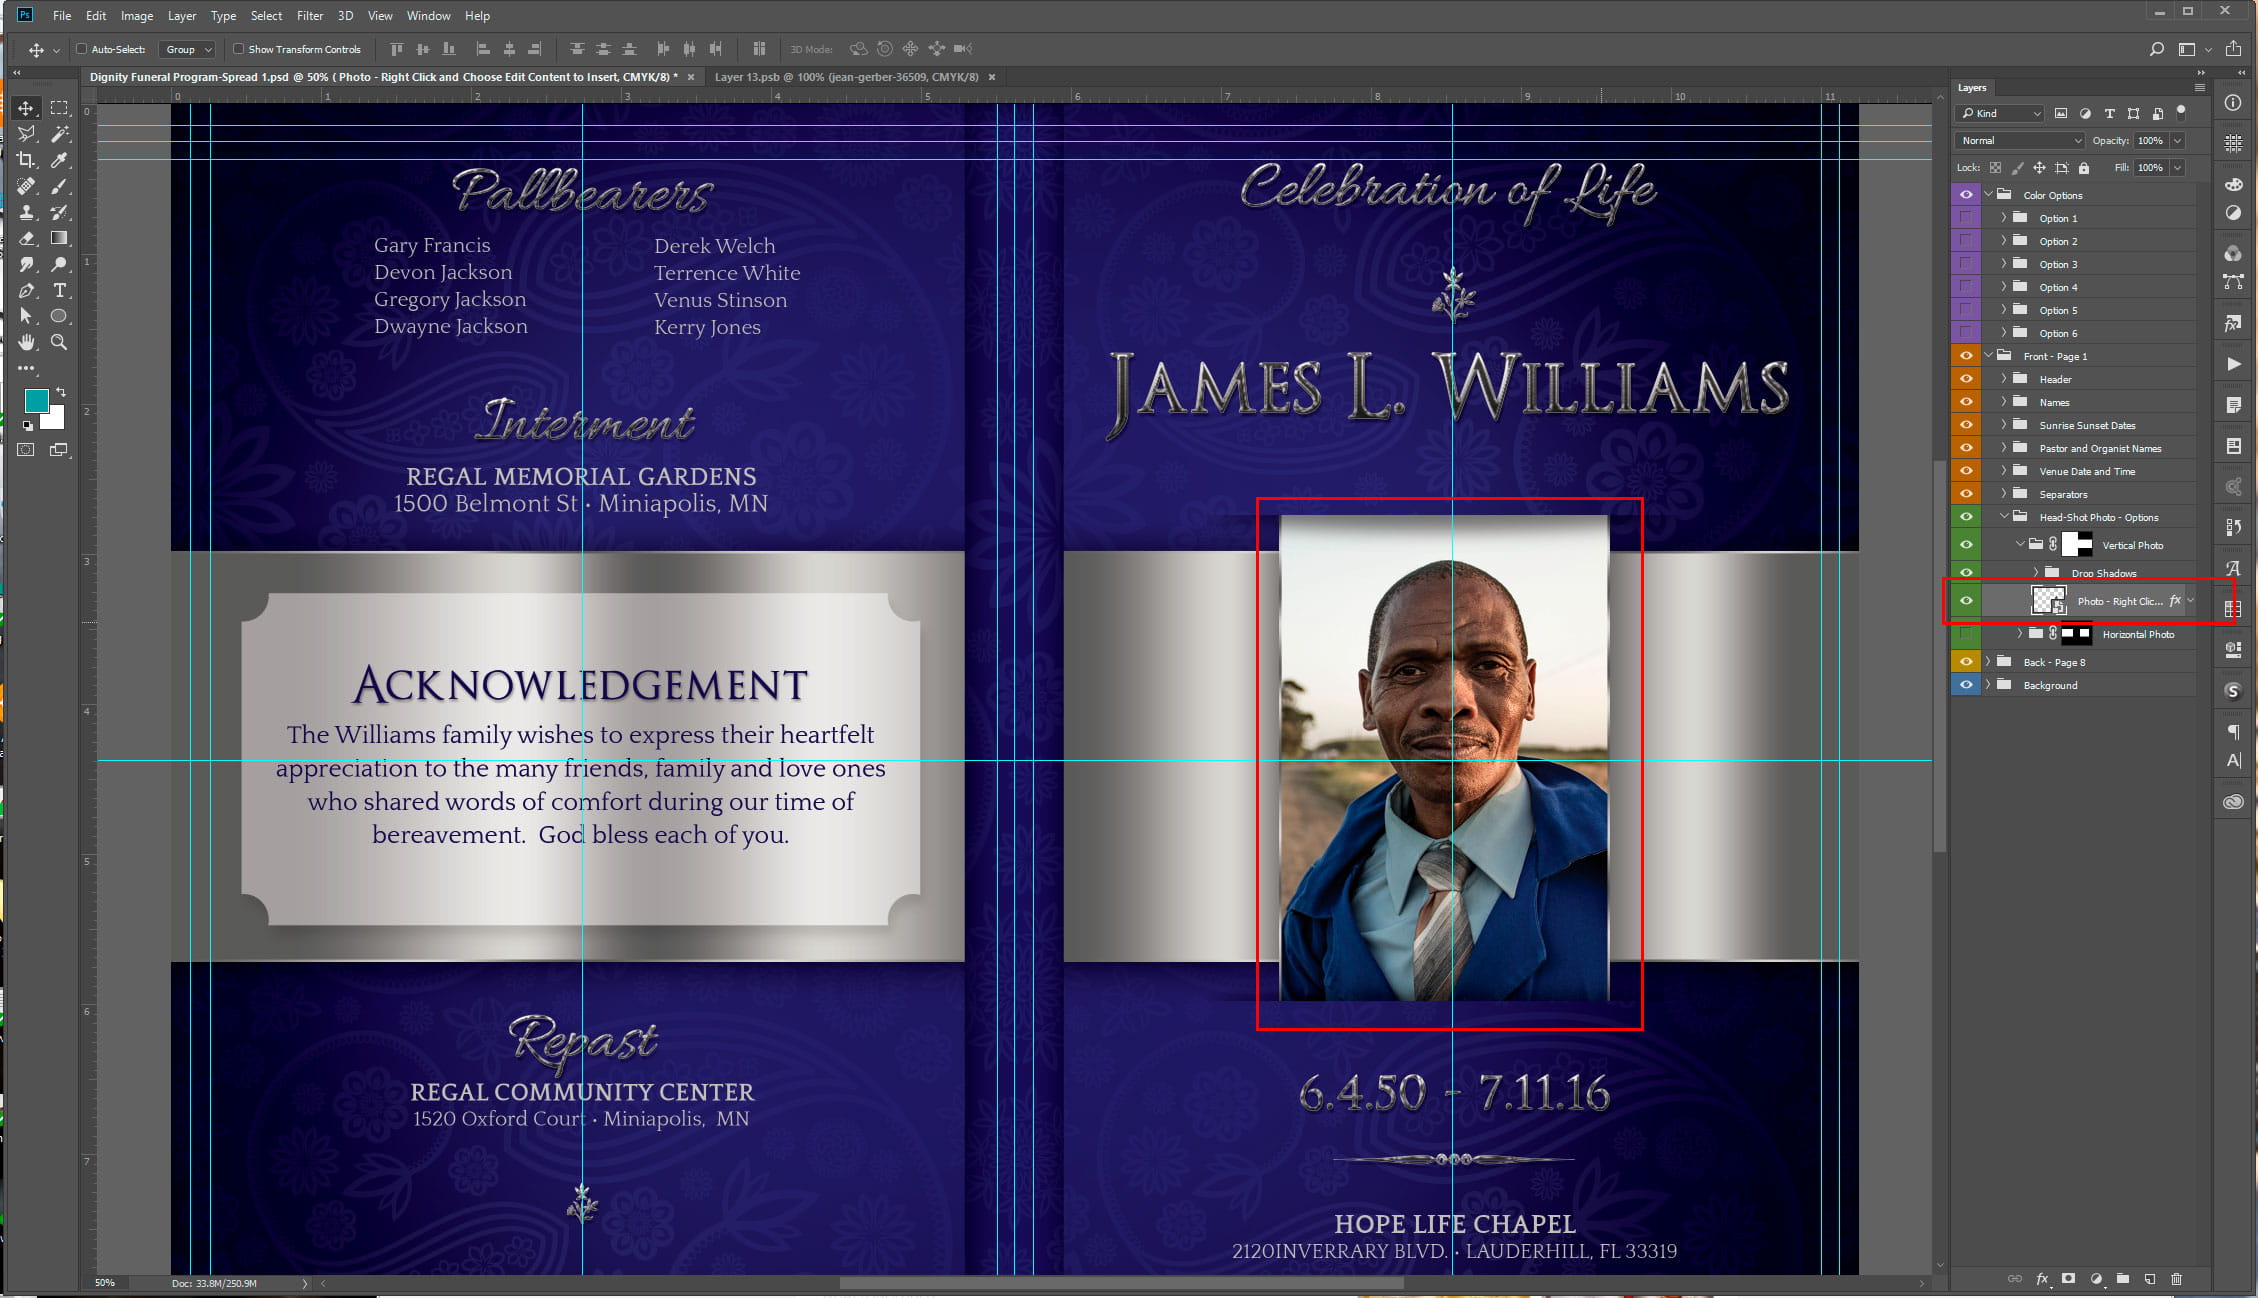
Smart Object are sometimes used for image place holders within a Photoshop template. Smart Objects are layers that contain image data from raster or vector images, such as Photoshop or Illustrator files. Smart Objects preserve an image’s source content with all its original characteristics, enabling you to perform nondestructive editing to the layer. That’s a mouth full for those not familiar with Photoshop, but simply put, a Smart Objects holds a Photo or Vector Image in a container, allowing you to make nondestructive edit. The Smart Object technique for Photo place holders within a template is very ideal. This tutorial will show you how to insert a Photo into a Smart Object that is contained in a template. In this case, it will be a Funeral Program Template by Godserv Designs. Template Used Dignity Funeral Program Photoshop Template Photo Used for Smart Object Courtesy of Gene Gerber, Unsplash.com Application Requirement Photoshop CS3 or…    read more 

Gradient Layer Style - Gradient Editor Photoshop

How to Edit Photoshop Template Gradient Layer Style

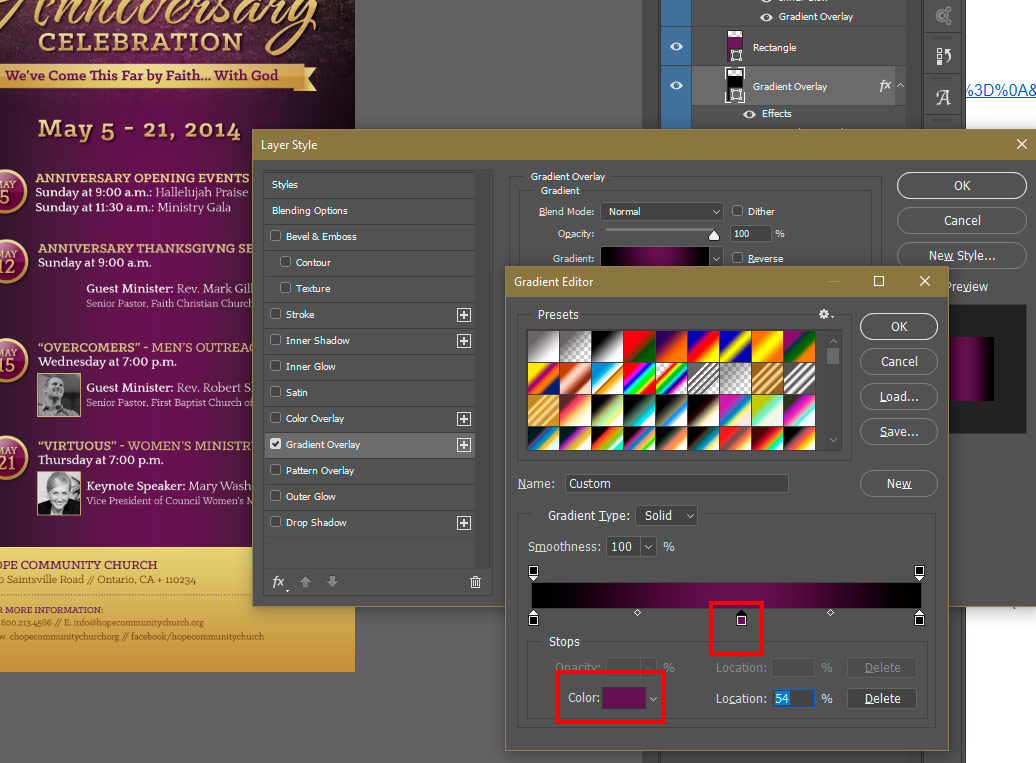
Knowing how to Edit a Photoshop Template Gradient Layer Style is important, because many Photoshop Templates uses gradient layer effects for lighting, shading, background color and more. A gradient is basically a transition of one color to another. In this Photoshop tutorial, you will learn how to edit a Gradient Layer Style (Effect) that is in a Photoshop Template. Template Used Church Anniversary Events Rack Card Template Application Requirement Photoshop CS3 or higher How to Edit Photoshop Template Gradient Layer Style Open your layer palette and find the layer that has a gradient layer style applied to it. In this case the layer is named ‘Gradient Overlay” – this layer has a gradient overlay effect on it that you will need to edit in order to change the gradient color. This template has a black to purple gradient. We will be changing the Purple to Blue. Click the small arrow…    read more 

Edit templates

How to Edit Templates in Photoshop

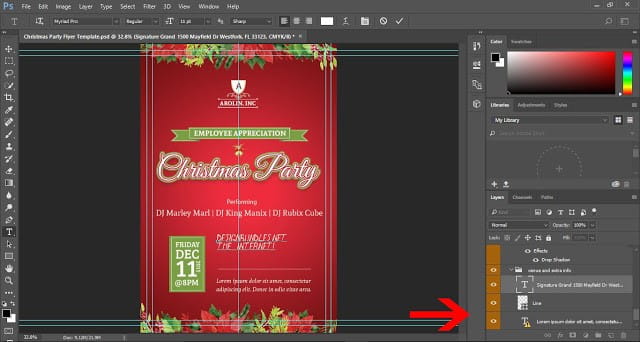
Here is a brief overview tutorial on how to Edit templates in Photoshop. You will need Adobe Photoshop to Edit Adobe Photoshop Templates. If you do not own Adobe Photoshop, you can download a trial version or purchase it here:http://tinyurl.com/n4stbhf Files Used: Christmas Party Flyer Template How to Edit Templates in Photoshop Ensure that your file has been downloaded and unzipped to use. 1- Open Ps. Click on file > Open. 2- A new box will appear. Select the Photoshop template you would like to use and then select open. 3-You may get a new box appear stating that the file is using fonts that are not on your PC. At this point, if the required fonts came with the template close Photoshop and install the font, then re open Photoshop and the template. If the template did not come with the fonts needed follow the prompts on the pop…    read more 

Masks

Digital Painting in Photoshop Ep.16 – Masks and Selections

December 23, 2011 |

Digital Painting in Photoshop Ep.16 – Masks and Selections : This tutorial will cover the basics of painting with Masks and Selections, you should look at Episode 11, that covers Line Art before looking at this, so you get a good understanding of what we are doing. 1. Making Lineart/Inks 2. Creating Masks 3. Creating Custom Patterns 4. Laying in Patterns 5. Painting in Selections     Digital Painting in Photoshop Ep.16 – Masks and Selections [sociallocker] [/sociallocker]    

stroke

Digital Painting in Photoshop Ep.15: Stroke Path Techniques

November 16, 2011 |

Digital Painting in Photoshop: In this tutorial we will be looking at different stroke path techniques, using a pen tool also using shapes and paths. 1. Paths + Brush Tool 2. Pen Tool Strokes 3. Creating Patterns 4. Custom Shapes tip 5. Industrial Design Uses     Digital Painting in Photoshop Ep.15: Stroke Path Techniques [sociallocker] [/sociallocker]  

ERGONOMICS

Digital Painting in Photoshop Epi.14: Ergonomics

November 2, 2011 |

Digital Painting in Photoshop: In this tutorial we will be looking at Ergonomics and how it relates to Digital painting. We will be discussing specifically how to arranging your workstation, stylus handling other useful aids and Tips. [sociallocker] [/sociallocker]  

Digital Painting in Photoshop Epi 12: Transform tools

October 7, 2011 |

In this tutorial we will will learn how to use the  Transform tools in our Digital Painting projects, we will learn some Tips for Free Transform, Additional Options, Warp option and I will showcase some examples of how you can use these techniques in your work flow.

Digital Painting in Photoshop Epi 7: Custom Brushes

August 12, 2011 |

In this tutorial we will learn about making your own custom brushes. Custom brushes can be very useful, they can be used to paint different types of textures and shapes and they are especially useful in the Digital Painting workflow, because they can be saved and used in multiple projects, saving you a lot of time. Lets get started! Topics Include: 1. What are Custom Brushes? 2. How to make one 3. Using a photo 4. Using brush to make silhouettes [sam id=3 codes=’false’] Speed Painting: African Female Portrait

Digital Painting in Photoshop Epi 6: Brush Tool Presets

July 27, 2011 |

In this tutorial we will learn a little more about customizing our brushes and how to change the Photoshop presets for use in our Digital Painting projects, we will also learn how to save our brushes, manage brush sets and get familiar with brush modes. Lets get started! Topics Include: 1. Brush Settings 2. Saving Brushes/Tools 3. Managing Sets 4. Brush Modes [sam id=3 codes=’false’] Speed Painting: Cinematic Environment Sketches: Desert

digital painting

Digital Painting in Photoshop Epi 6: Brush Tool Settings

July 22, 2011 |

In this Digital Painting in Photoshop tutorial we will learn how to use the brush tool and how to utilize different settings for our Digital Painting, we will also learn how to set up hot-keys, modify default settings and get familiar other amazing functions. Lets get started! Topics Include: 1. Brush Settings 2. Saving Brushes/Tools 3. Managing Sets 4. Brush Modes 5. Hotkeys/Actions [sam id=3 codes=’false’] Speed Painting: Environment Sketch Demo (Digital Painting in Photoshop)

Digital Painting in Photoshop Epi 5: Layers Palette

July 18, 2011 |

In this tutorial we will be learning about layers in Photoshop and how they can be used in our Digital Painting workflow. One of the most important keys to learning and mastering Photoshop is using layers. Layers allow you to work on individual parts of an image while not affecting other parts. You might say that layers are like transparency papers stacked on top of one another which can be repositioned separately and drawn on without disturbing each other. 1 Lets get Started! Topics Include: 1. What are layers? 2. Using the palette 3. Layer Modes 4. Workflow Tips 5. Layer Comps [sam id=3 codes=’false’] Speed Painting-Portrait Study: Masai

Digital Painting in Photoshop Epi 4: Photoshop Tools

July 13, 2011 |

In this tutorial we will be learning more of the Photoshop tools that are essential to Digital Painting workflow. When learning Digital Painting you can find a lot of information on techniques and tips n Tricks, but learning the tools and procedure first will allow you to be successful at painting. Lets get started! Topics Include: 1. Tools Overview 2. Tips for workflow   [sam id=3 codes=’false’] Speed Painting – Digital Painting of a friend

Digital Painting in Photoshop Epi 3: Basic Functions

July 8, 2011 |

In this tutorial we will be learning the basic functions when setting up a new document for your digital painting project, the main consideration is setting up for print or web. We will learn other task like how to pan and zoom, toggle the interface and other important functions inside of Photoshop, lets get started! Topics Include: 1. New Document 2. Saving 3. Pan + Zoom 4. View Modes 5. Toggle Interface 6. New Window 7. Actions [sam id=3 codes=’false’] Speed Painting: Drawing and Painting a Male Face – From Imagination