
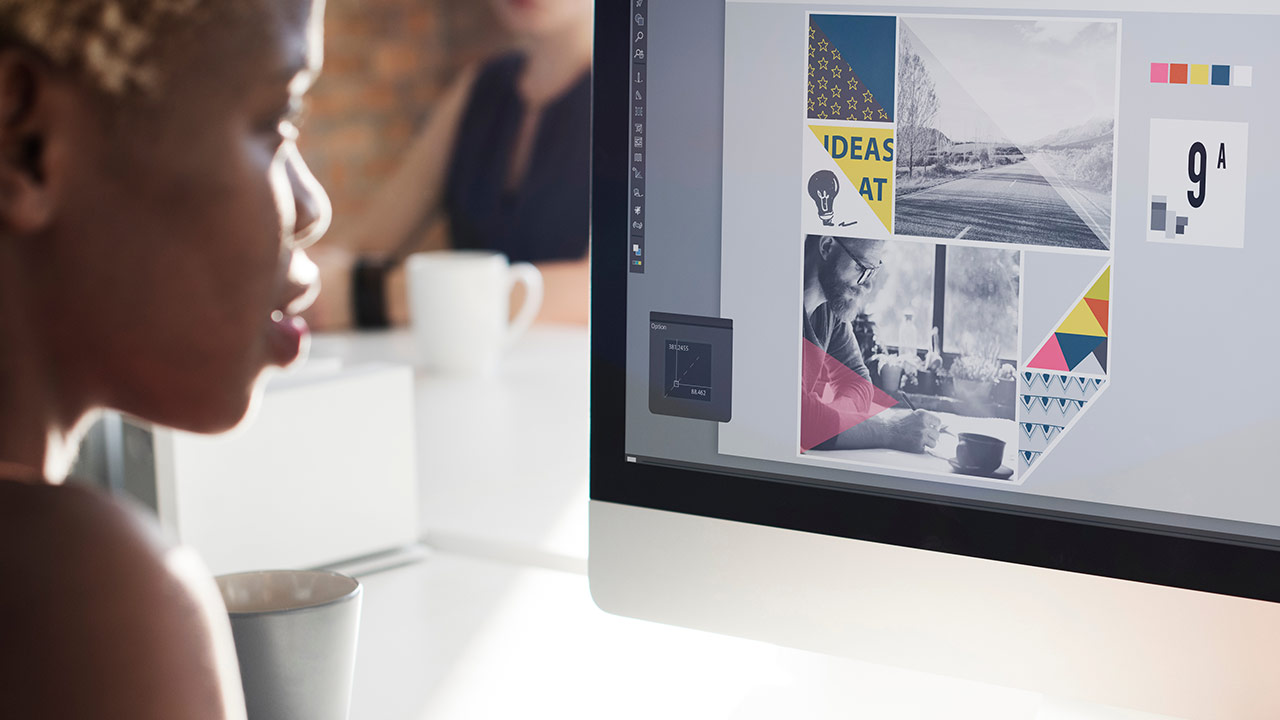
🖥️ Elevate Your Microsoft Word Design Game! 🎨 Godserv Designs brings you an engaging tutorial on the art of inserting images into shapes, unlocking a world of creative possibilities. Perfect for beginners and design enthusiasts alike, this step-by-step video guide showcases the process using the Blue Sky Funeral Program Template but extends its application to a variety of design projects. Learn to seamlessly inserting images and customizing images within specific shapes, giving your documents a polished and professional look. Quick, easy, and packed with valuable tips, this tutorial is a must-watch for those seeking to enhance their Microsoft Word design skills. For a hands-on experience, check out the tutorial here and elevate your design game today! 🚀
Graphic Design

If you’ve recently purchased a Microsoft Word or Publisher template from platforms like Godserv.com, Etsy, Creative Market, or Design Bundles, you might find yourself needing to replace images within the template to personalize it. In this tutorial, we will focus on the “Change Image from File” method in Microsoft Word, which allows you to seamlessly replace photos and image backgrounds in your template. Whether you’re creating invitations, flyers, or any other document, mastering this technique will help you customize your templates effectively. So let’s dive in and learn how to replace images in Microsoft Word templates! Video Tutorial Open the Microsoft Word Template: Begin by opening the Word template you purchased. It could be an invitation, brochure, or any other document you wish to customize. Familiarize yourself with the existing images that need replacement. Locate the Image Placeholder: Identify the image placeholder within the template. It is usually denoted by… read more
When it comes to creating a funeral program, Microsoft Word offers a versatile and user-friendly platform to bring your vision to life. In this blog, we will provide a comprehensive review of how to edit Microsoft Word Funeral Program Templates. By learning these essential tips and tricks, you can accomplish 90 percent of the work required to edit these templates efficiently. We have also included a video tutorial that covers the main focus areas, including inserting photos, editing text, and modifying colors. So let’s dive in and become proficient in editing Funeral Program Templates using Microsoft Word! Video Tutorial Replacing Photos in Word One crucial aspect of personalizing funeral program templates is replacing the default photos with meaningful images. The video tutorial demonstrates the step-by-step process to accomplish this. By following along, you will learn how to select and insert a photo, adjust its size, and position it correctly within… read more
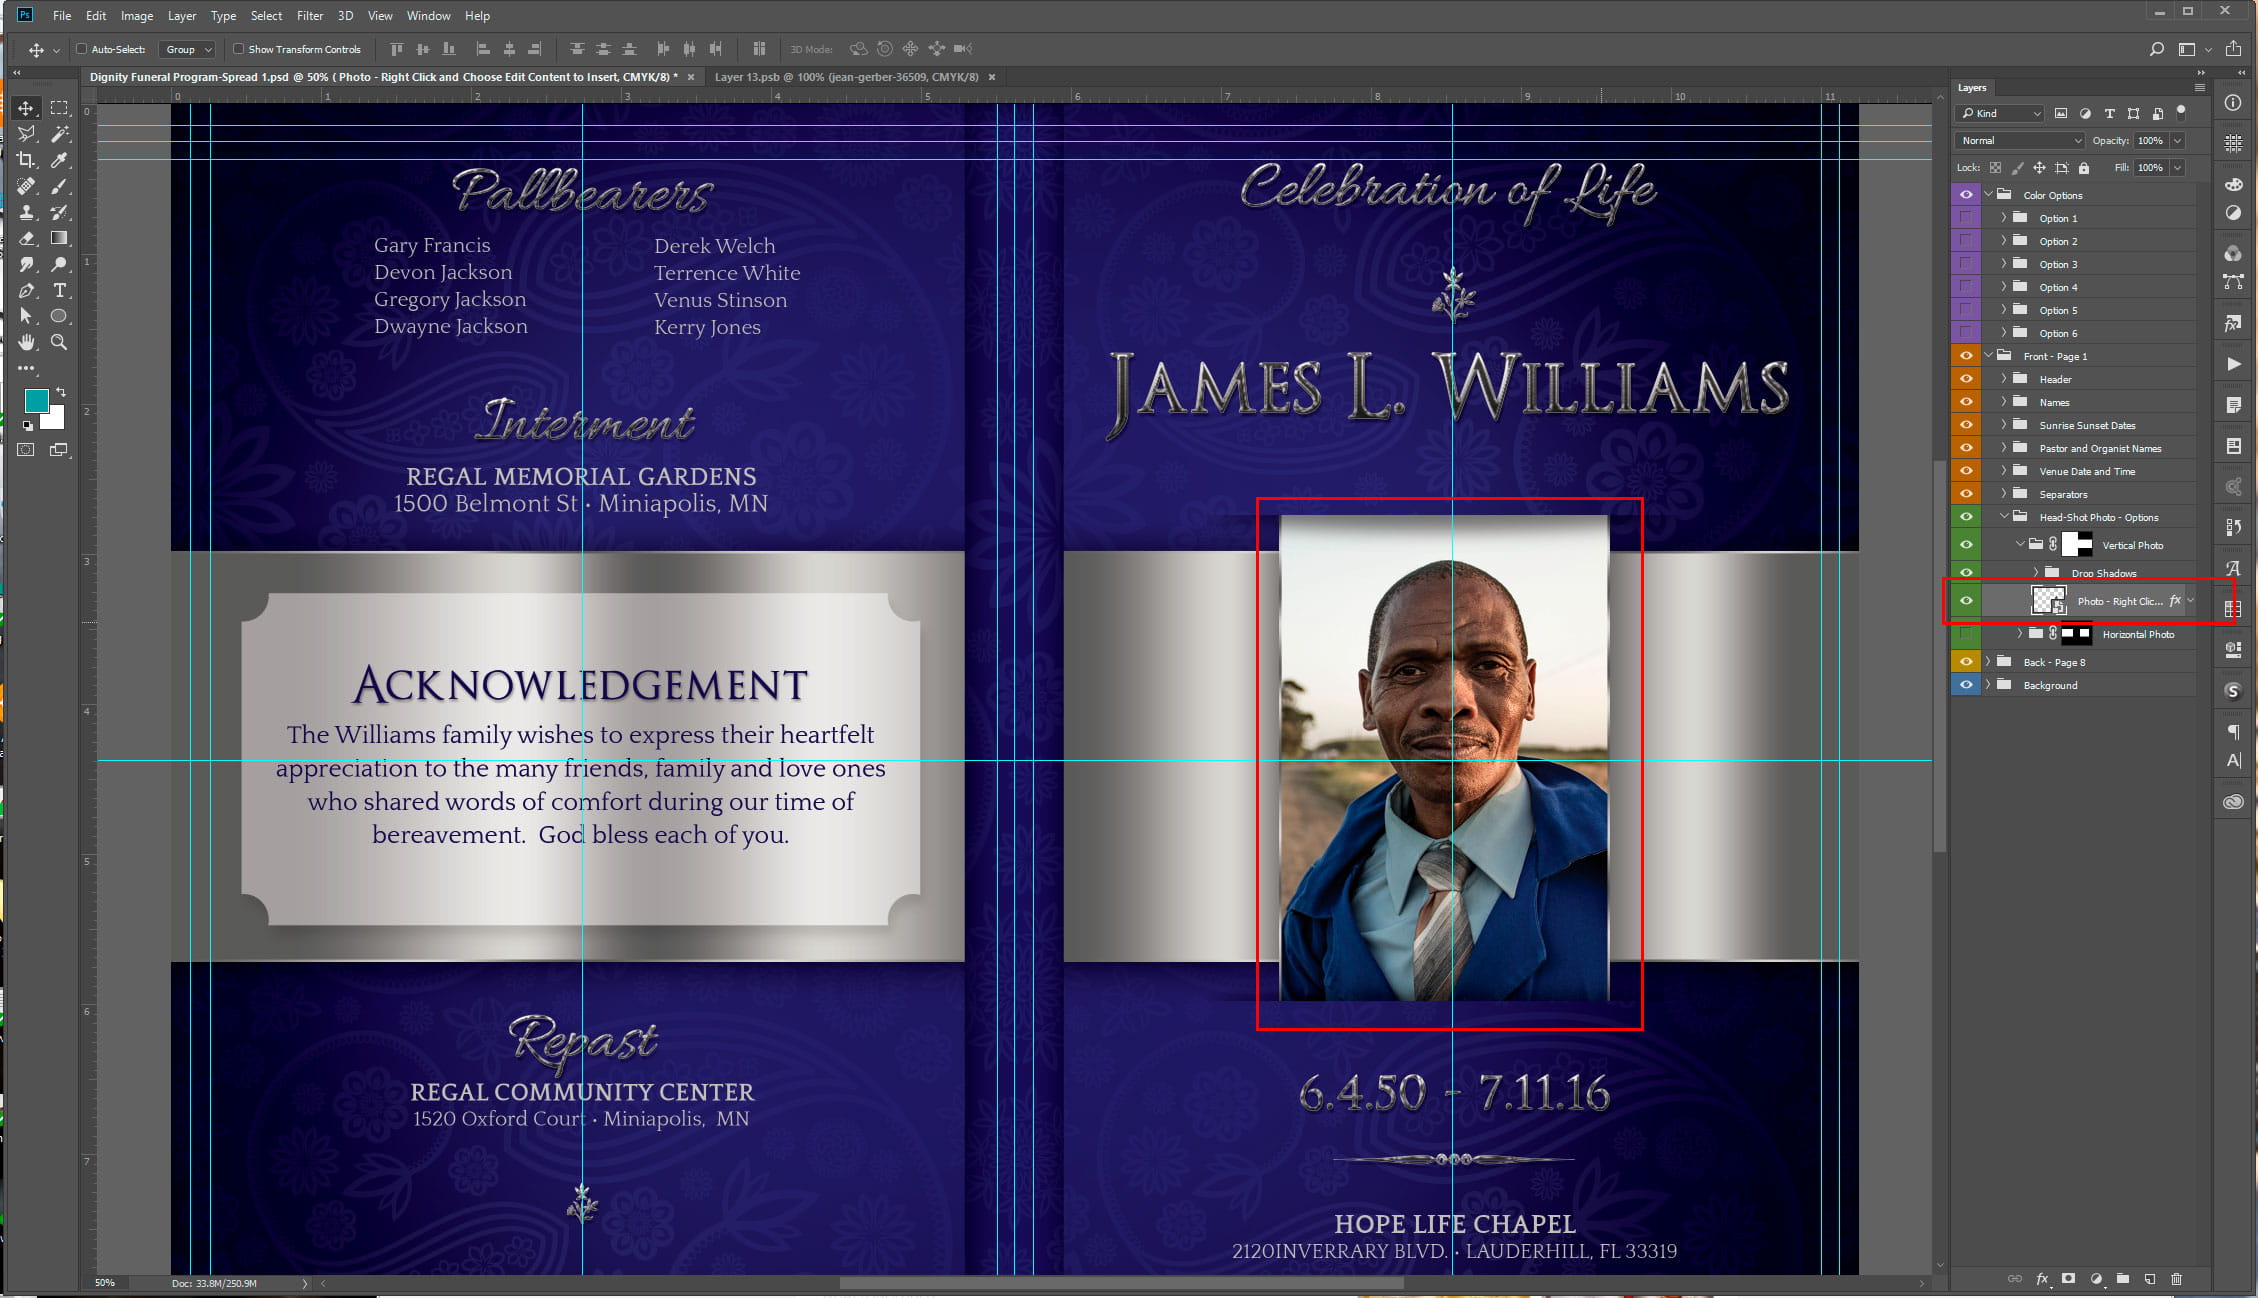
Smart Object are sometimes used for image place holders within a Photoshop template. Smart Objects are layers that contain image data from raster or vector images, such as Photoshop or Illustrator files. Smart Objects preserve an image’s source content with all its original characteristics, enabling you to perform nondestructive editing to the layer. That’s a mouth full for those not familiar with Photoshop, but simply put, a Smart Objects holds a Photo or Vector Image in a container, allowing you to make nondestructive edit. The Smart Object technique for Photo place holders within a template is very ideal. This tutorial will show you how to insert a Photo into a Smart Object that is contained in a template. In this case, it will be a Funeral Program Template by Godserv Designs. Template Used Dignity Funeral Program Photoshop Template Photo Used for Smart Object Courtesy of Gene Gerber, Unsplash.com Application Requirement Photoshop CS3 or… read more
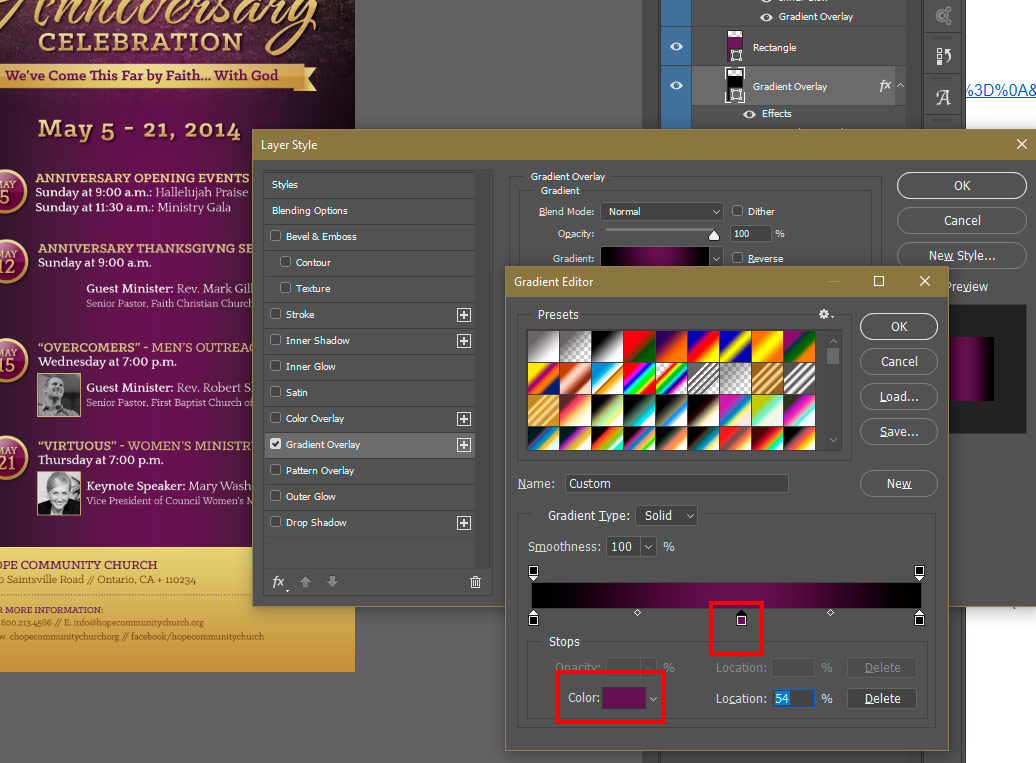
Knowing how to Edit a Photoshop Template Gradient Layer Style is important, because many Photoshop Templates uses gradient layer effects for lighting, shading, background color and more. A gradient is basically a transition of one color to another. In this Photoshop tutorial, you will learn how to edit a Gradient Layer Style (Effect) that is in a Photoshop Template. Template Used Church Anniversary Events Rack Card Template Application Requirement Photoshop CS3 or higher How to Edit Photoshop Template Gradient Layer Style Open your layer palette and find the layer that has a gradient layer style applied to it. In this case the layer is named ‘Gradient Overlay” – this layer has a gradient overlay effect on it that you will need to edit in order to change the gradient color. This template has a black to purple gradient. We will be changing the Purple to Blue. Click the small arrow… read more
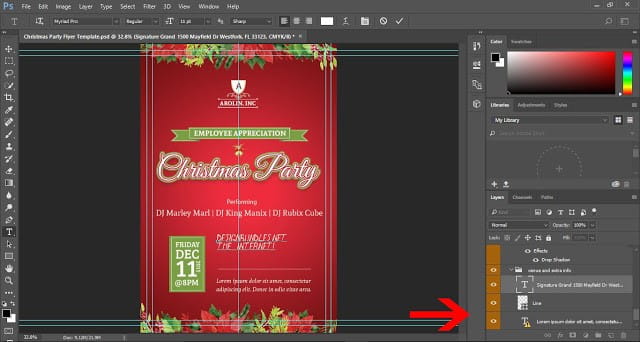
Here is a brief overview tutorial on how to Edit templates in Photoshop. You will need Adobe Photoshop to Edit Adobe Photoshop Templates. If you do not own Adobe Photoshop, you can download a trial version or purchase it here:http://tinyurl.com/n4stbhf Files Used: Christmas Party Flyer Template How to Edit Templates in Photoshop Ensure that your file has been downloaded and unzipped to use. 1- Open Ps. Click on file > Open. 2- A new box will appear. Select the Photoshop template you would like to use and then select open. 3-You may get a new box appear stating that the file is using fonts that are not on your PC. At this point, if the required fonts came with the template close Photoshop and install the font, then re open Photoshop and the template. If the template did not come with the fonts needed follow the prompts on the pop… read more
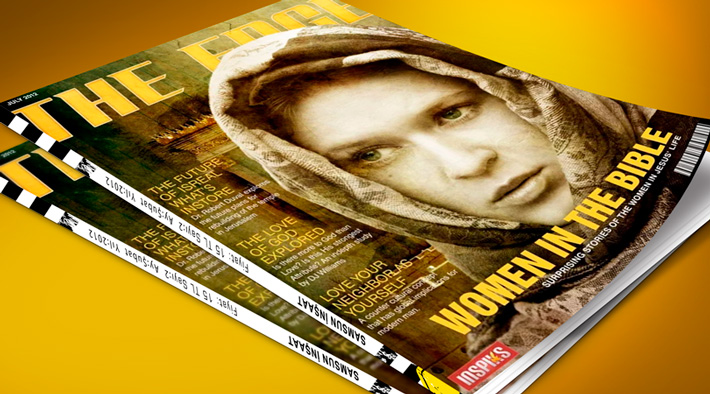
Create a Magazine Cover using Photoshop and InDesign CS5: This tutorial will demonstrate how to create a magazine cover. We will be using Photoshop and InDesign to create different aspects of the cover. My last magazine cover tutorial was created using only Photoshop. In this version we will use InDesign for better type management and Output for printing. Let’s get started! Final Image Resource Second Jerusalem Temple model from Stock.xchng Portrait Girl in a Scarf from Stock.xchng Gold Grunge 5 from Stock.xchng Gold Grunge 4 from Stock.xchng Add City Boy Font from Dafont Barcode Font by BarcodeInc [sociallocker] Step 1 The first thing you should do is a little research on the type of magazine cover you want to create. The style will depend on your topic. The types of magazine cover you can make is only limited to your imagination. Since we want our design to look professional,… read more
Create a Painted Poster: Photoshop Paint filters can be used give a painted look to your images. Here is a quick tutorial on how to accomplish the painted look. The goal of this design was to get a painted effect, that kept some of the realism of the original image still intact. The use of the default filters in Photoshop is usually discouraged among seasoned designers, because the effects are usually obvious, but if time is taken to customize and mix the filters, you can get some interesting effects. Lets dig in! Inspiration Search me, God, and know my heart; test me and know my anxious thoughts. See if there is any offensive way in me, and lead me in the way everlasting. Psalm 139.23-24 Resource KP 45 (Ryan Aréstegui) from Stock.xchng Angelic War Font from Dafont Helvetica World from My fonts Final Image [sociallocker] Step 1 Open… read more
Create A Planetary Star Field in Photoshop: In this tutorial we’ll learn how to create a Planetary Star Field using masks and a few star brushes. Photoshop brushes are very powerful, they can simulate real life objects, like trees, birds and in our case, a Planetary Star Field. You can find many free brushes online at places like Brusheezy and Deviant Art. While this is a fairly simple process to achieve, there are a few tips and tricks that can be applied to any project to increase productivity and enhance the realism of your scene. Lets get started! Inspiration This tutorial was inspired by Tyler van der Hoeven’s Image called Star Field. Thanks to Tyler for graciously allowing me to use his high-resolution photo in the process of recreating the image. The image reminded me of Psalm 19:1-4 The heavens declare the glory of God; the skies proclaim the work… read more
Cutting Out Hair in Photoshop CS5: Photoshop CS5 comes with some exciting tools for designers, one of them that stand out is the new Refine Edge tool. It really helps when cutting out an object from a background especially when it involves human hair or any type of fur that is troublesome and can be tricky to achieve a realistic look. With Photoshop CS5 it is now possible to achieve the task very easily. Here are a couple techniques you can use on images especially those those with varied background tones, the results takes just a few mouse clicks. In this tutorial we will be replacing a dull background with a very cool sunset, Check it out! Final Image Resource sunbathing 2 from Stock.xchng Sunset from Astoria, Queens from Stock.xchng [sociallocker] Step 1 Open the sunbathing 2 from Stock.xchng, then crop it down to about 24×24 inches, removing the… read more
If you use Photoshop extensively, you should be familiar with Channels. Channels are used to masks areas of an image, cut specific areas from an image or apply adjustment or effects to specific areas of an image. Channels are one of the most powerful tools used to achieve simple or complex results in our work. We will use this tutorial to show how to apply two spot channels to a poster design. One spot channel will be used to print a 5th color to the piece, a spot color (pre-mixed ink) and the other will be used to apply a spot UV Coating to the statue on the finished printed work. What is Spot UV Coating? If you want to achieve a glossy coat on a certain image on the page, but don’t need or want the entire page to be coated, then you should use spot UV coating…. read more


You must be logged in to post a comment.