
Create A Planetary Star Field in Photoshop: In this tut orial we’ll learn how to create a Planetary Star Field using masks and a few star brushes. Photoshop brushes are very powerful, they can simulate real life objects, like trees, birds and in our case, a Planetary Star Field. You can find many free brushes online at places like Brusheezy and Deviant Art. While this is a fairly simple process to achieve, there are a few tips and tricks that can be applied to any project to increase productivity and enhance the realism of your scene. Lets get started!
Inspiration
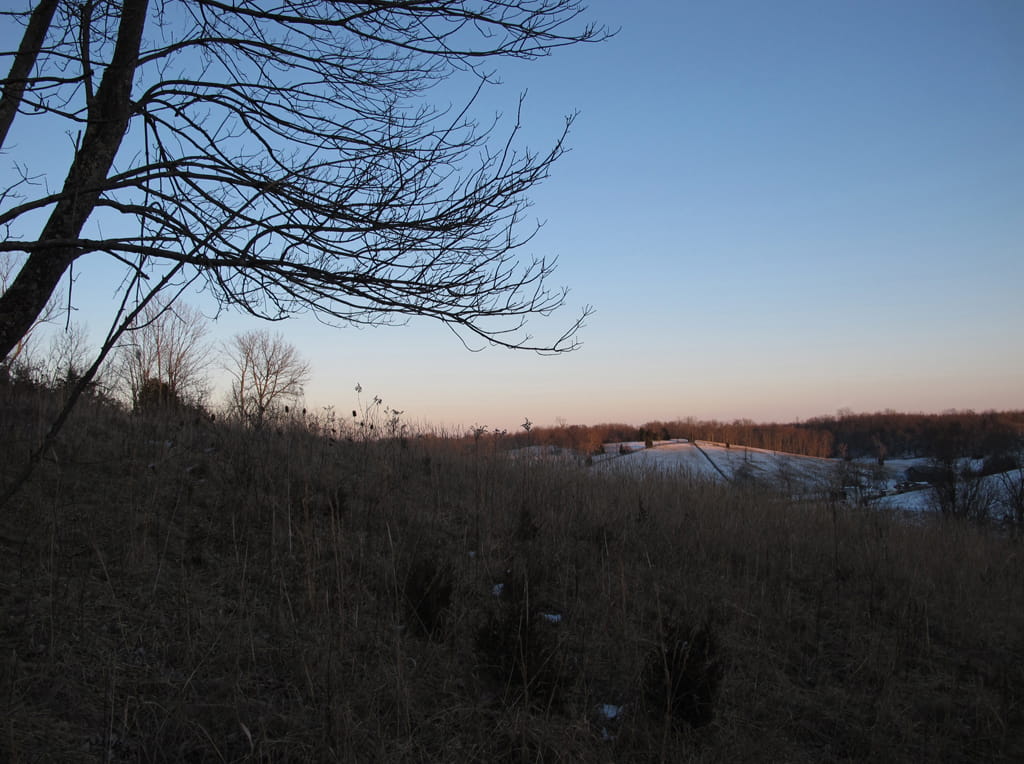
This tutorial was inspired by Tyler van der Hoeven’s Image called Star Field. Thanks to Tyler for graciously allowing me to use his high-resolution photo in the process of recreating the image. The image reminded me of Psalm 19:1-4
The heavens declare the glory of God; the skies proclaim the work of his hands. Day after day they pour forth speech; night after night they reveal knowledge. They have no speech, they use no words; no sound is heard from them. Yet their voice goes out into all the earth, their words to the ends of the world… Psalm 19:1-4
Final Image

Resource
- Background Image by Tyler van der Hoeven
- Deep Space Brushes by v-k-s
- Rabies Star Brushset by Rabieshund
- Moon Brush Set by Barbiedoll
- Ultimate Web 2.0 Gradients by DesignFolio
[sociallocker]
Step 1
Open the Background Image by Tyler, double-click the image in the layer palette to turn it into a new layer.

Step 2
Use the clone tool to remove those distracting elements in the foreground.


Step 3
Before we start the process of adding our star field, we need to create a mask, because we do not want to paint over those tree on the left or the ground area. Make a copy of the background image, then turn off the original. Click Window > Mask to activate the Masking Dialog box. Click Pixel Mask, this will activate the Pixel Mask options.

Select the Color Range to activate its options.

Hold down the Shift Key and start to select all the colors from the sky.

Select the sky colors behind the trees and close to the horizon, until you have something that looks like the image below, then click OK.

Use a soft black brush to remove the area of the mask below the horizon.

Step 4
Now we will make a Selection of the Layer Mask we just created. Control–Click the Layer Mask Thumbnail in the Layer Palette and a selection will be created.

Save the selection, so that if you make any mistakes you can load it again. Click Select > Save Selection.

Name the selection, then Click OK.

Turn on the First Layer, so that we can see the entire scene with the Selection.

[sam id=3 codes=’false’]
Step 5
Now we will create a Gradient Map Adjustment Layer inside our selection, this will darken our sky up a bit, so that we can start painting our stars. While the selection is still active, create a new layer above it. Click Window > Mask. Activate the Adjustment Tab, then click Gradient Map option, see image below.


Change the Layer Style of the Gradient Map to Multiply and an Opacity of 78%.

Step 6
Now we will start painting some distant stars. Create a New Layer, then load the Sky selection, Select > Load Selection. Select the Sky, from the Channel Drop down Menu, the press OK.

Set Photoshop Foreground Color to White and the Background Color to Black, Select one of the brushes that has distant stars and start painting your stars. I placed most of the stars to the right of my scene where I want the focal point to be. I also created another layer, loaded my selection again and painted some dim stars behind the trees. Â To dim the stars, just lower the opacity of the Layer.

This part you can get very creative and just have a lot of fun! Here is my progression of star painting. I added a layer of large galaxy and stars.

Added more layers with small stars at the horizon and another large galaxy at the top and a moon.

Step 7
Now we will deselect our sky selection and start adding some Adjustment Layers to change the lighting of the Image.
Curves Adjustment Layer

Levels Adjustment Layer
Settings: 14 – 1.03 – 225

Color Balance Adjustment Layer
Cyan +32, Magenta -23, Yellow -53

Gradient Adjustment Layer
Choose the Blue 22-3D gradient from the Ultimate Web 2.0 Gradients.

Set the angle to -161.57 and Click OK.

Set the Opacity to 45% and the Layer Style to Soft Light.

Add another Gradient Adjustment Layer
This gradient adjustment layer will be our vignette, the vignette will allow our image to be darker at the edges.

Change the Gradient Style from Linear to Radial.

Use a large, soft, black paint brush and paint the mask that was created, this will delete some of the excess black in the middle of the scene

Set the Layer Style to Overlay and the Opacity to 36%.

Final Image
Conclusion
This tutorial is a prime example of how we can change our digital photos into something that may only exist in our imagination. With the power of Photoshop masking techniques and the use of pre-made brush sets, we can cut production time down immensely, giving us more time to focus on our compositing. Hope you had fun! Be Blessed.
[/sociallocker]


13 thoughts on “Create A Planetary Star Field in Photoshop”
it’s very very nice
thank you for nice design.
visit
Hey Thanks Buddy.. 🙂
Hey Thanks Buddy For Help. I Have One More Query. You Have Told In A Step That “Create A Layer Above It.” What Is It?? Will You Clarify It??
“Create A Layer Above It.” …means…..Create a new layer above the previous layer.
Hey, tell me after running these brush files.. Where will I find The star and moon brushes in Photoshop.. Kindly Reply me on my email ID. thanks a lot..
After you install the brush in the Adobe Photoshop brush folder, open Photoshop, then click ..Window > Brush Preset. Click the small arrow to the right of the Brush Preset dialog box, you will see a list of the brushes that you have installed. click each one to load it. Choose Append brush, to load the brush with the default brushes still active.
I feel very good the tutorial, when I saw the finish I found it complex, but once developed the tutorial is not
thank you very much
That is a good compliment, happy it was not as hard as it looks in the final image 🙂
Thanks…….I am trying it out.
AWESOMEEE…. !!!!! NICE !!! THANKS A LOT !!! 🙂
Awesome tutorial, The effect is made really easy on this post, thanks
Thanks for checking it out 🙂
Just stunning. Loved it.